
TLDR: Tutorial on using RealityCapture to align an image dataset, export the alignment, and import it into PostShot to train Gaussian Splats without using COLMAP.
Video tutorial
RealityCapture
Import your images and align them. If you ever need help with tricky dataset, refer to my Reality Capture Alignment Settings, Tips, & Fixes article.
Once your data is aligned, export these two items:
1. Registration

Go to Alignment > Registration, select “Internal/External camera parameters” as the type, and name it anything you’d like.
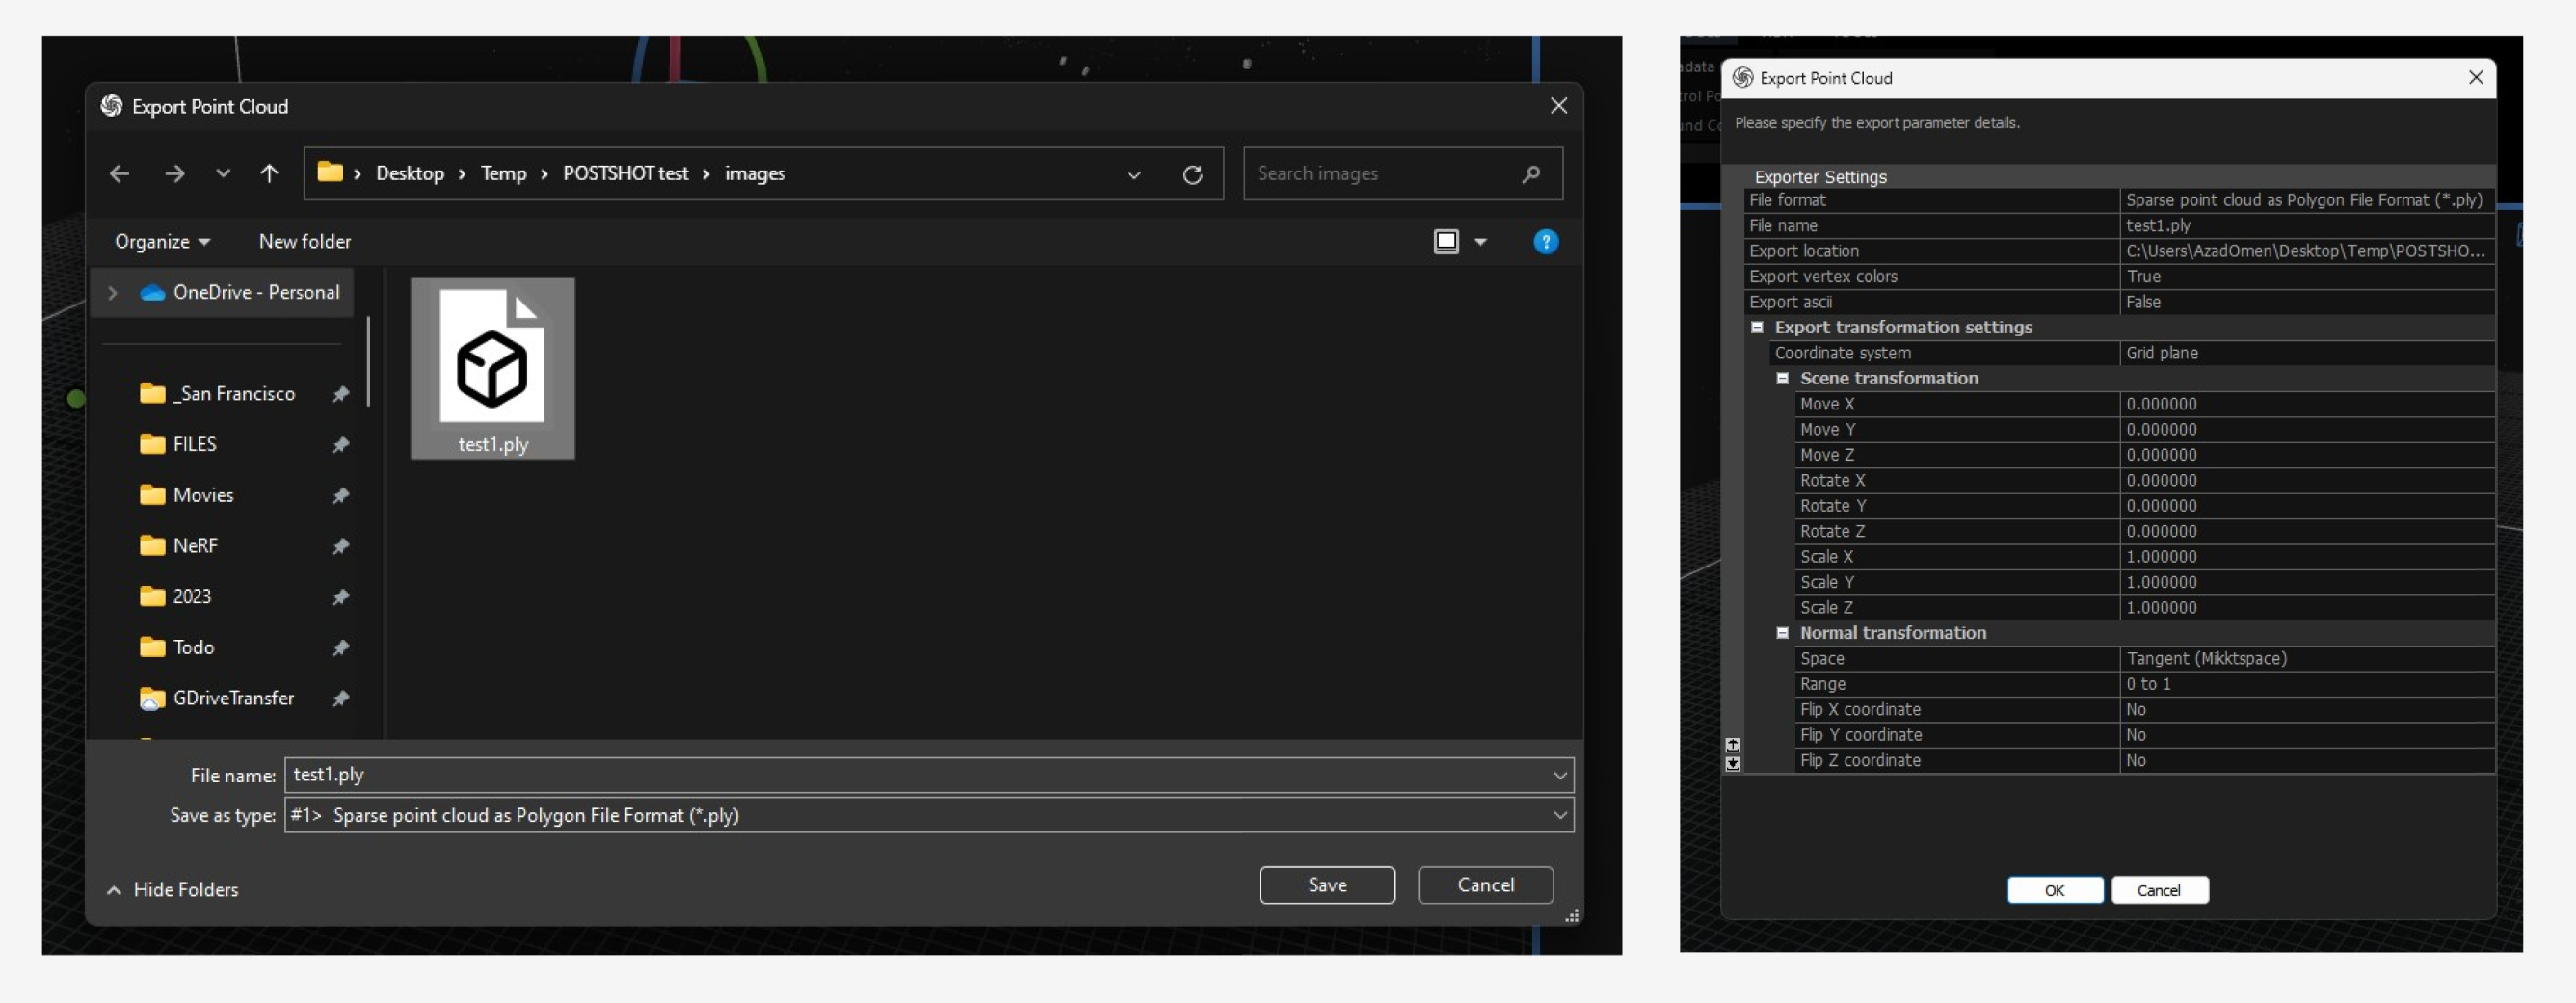
Export it with default settings and save it in the same folder as your source images.

2. Point cloud
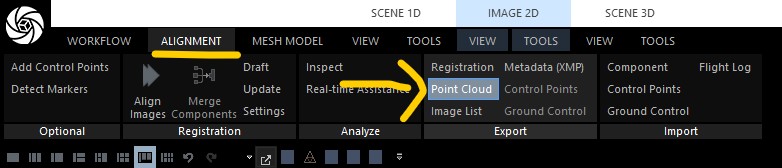
Go to Alignment > Point Cloud, select “Sparse point cloud as Polygon File Format (*.ply)” as the file type and name it anything you’d like.
Toggle the “Export ascii” setting to “False“. Export it with default settings.
PostShot
Launch PostShot and drag and drop everything in your source image folder. It should contain
- your images
- your registration .csv file
- your point cloud .ply file
With the import dialogue, make sure to select “Use All Images” and “Camera Posts: Import“.
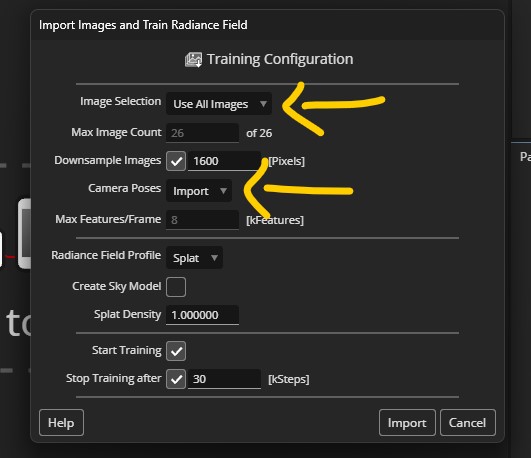
Import and train!
Scripts and Automation
If you wanna speed up this process or have quite a lot of data to process, I recommend using CLI for both RealityCapture and PostShot.
I’ve put together a few scripts that I access to speed things up.
BAT Script (starting from scratch)
This batch script is a super easy way to automate going from an unaligned set of images -> trained 3DGS with a single click.
Download: https://github.com/azadbal/RealityCapture-to-PostShot
Setup
The script requires that you have the project set up as the following:
- Project root folder
- “images”
Open the RC_3DGS_train.BAT and change the directories, specifically the RealityCaptureExe, PostShotEXE, and SettingsFolder to local ones.
Usage
Place the BAT file into the root of a project. Make sure the images are in a subfolder called “images”.
To run it, either double click on the BAT file, accept the permissions that windows asks, and see it run. OR, if it crashes and you want to see the error messages, run it via command line.
RCCMMD (pre-existing RC projects)
If you already have a RealityCapture project with your images aligned, I recommend using this RealityCapture command file that you drag and drop onto RC, which executes a set of CLI commands.
The script will export the files into a specific output folder that you can define. It cannot be a relative directory, so I recommend making a folder that you can easily access to copy the output files from.
Setup
Download the Settings folder and the 3dgs_export.rccmd from the repo.
Open the RCCMD file in Notepad, adjust the directories so that it’s:
-exportRegistration "[folder]\registeration.csv" "[folder]\Settings\3DGS_reg.xml" ^
-exportSparsePointCloud "[folder]\pointcloud.ply" "[folder]\Settings\3DGS_ply.xml"
Make sure to put the Settings folder (and its contents) in the same directory too.
Usage
Once it’s set up, you can just drag and drop the .rccmd file onto RealityCapture, which will output the Registration and PLY file into your specified folder.
You should copy those files, and put them into the input images’ folder, then import that folder into PostShot.
Comparison (Initial Impressions)
While I haven’t yet done a full deep dive to compare the results between using the default COLMAP alignment and RC’s alignment, my initial impressions of using RC’s alignment has shown great promise in terms of detail and density.

I’ll try and do more testing in the meanwhile to see whether RC alignment is better than COLMAP.
For any comments, questions, etc, talk to me on Twitter or via email.
Cheers,
